22. QSPI Partition Table
QSPI memory is divided into smaller parts, called partitions. QSPI Partition Table tool is used for reading, writing and erasing flash partitions.
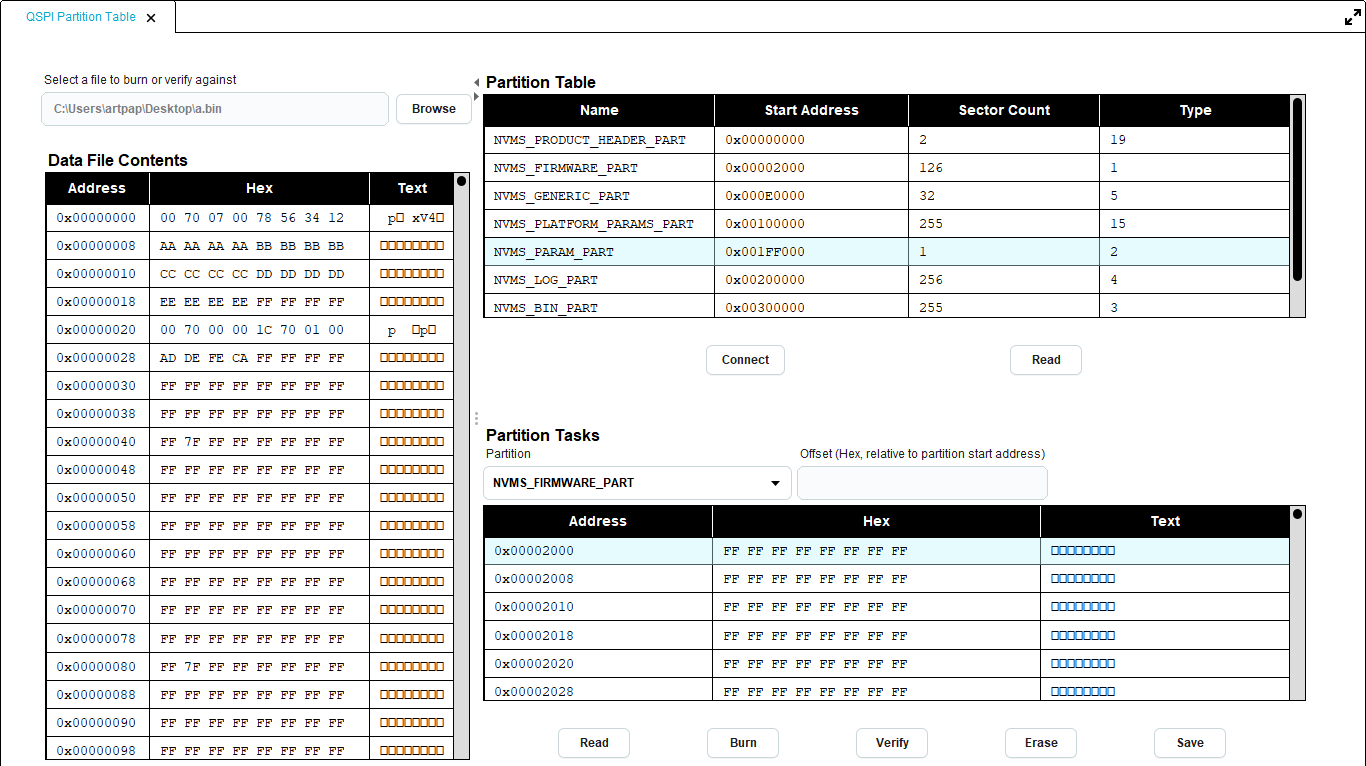
Figure 94 QSPI Partition Table
In the left part, the user can press the Browse button in order to select a file to burn to a partition or verify a partition against it.
The user can hide the left part of the tool and expand the right, or vice versa, by pressing the  arrows.
In the top right part of the tool, the user can see the contents of the partition table. In order to read the partition table from QSPI flash memory, the user has to first press the Connect button, in order to download the appropriate firmware to the board and the press the Read button. Once a partition table is successfully read from flash memory, the drop down box in Partition Tasks panel is updated with the list of the partitions and the buttons that perform operations on the selected partition, are enabled. The following tasks are available on each partition:
arrows.
In the top right part of the tool, the user can see the contents of the partition table. In order to read the partition table from QSPI flash memory, the user has to first press the Connect button, in order to download the appropriate firmware to the board and the press the Read button. Once a partition table is successfully read from flash memory, the drop down box in Partition Tasks panel is updated with the list of the partitions and the buttons that perform operations on the selected partition, are enabled. The following tasks are available on each partition:
Read: When the user selects a partition from the list and presses the Read button, the contents of the partition are shown in the table of Partition Tasks panel. The user can also enter an offset, which is relative to the partition start address, shown in Partition Table in Start column, in order to read only a part of the partition, starting from this offset and ending at the partition end. By relative, we mean that the user should enter offset 0x200 in order to read from address 0x80200, for a partition starting at address 0x80000. The offset cannot be larger than the total size of the partition, which is estimated as sector_count * sector_size. sector_count indicates the number of sectors a partition contains and is shown in Sector Count column of the Partition Table. sector_size indicates the size of every sector in bytes, is read from QSPI Flash memory and is printed in the log.
Burn: The user can load a file in the left part of the tool by pressing the Browse button, and then press the Burn button, in order to write it to the selected partition. If a value has been entered in offset field, the file contents will be burned in the specified, relative to the partition start address, offset. After burn, the partition is read again in order to refresh its contents.
Verify: The user can load the file to be verified a partition against in the left part of the tool, by pressing the Browse button. The user can also insert a value in offset field, in order to verify only part of the partition, starting from offset and ending after file_length bytes, where file_length is the size in bytes of the file that the partition is verified against. When the verification fails, an error message indicating the first address where the partition contents differ from the file contents, is shown in the log.
Erase: By pressing erase, all the bytes of the selected partition are erased. After erase, the partition is read again in order to refresh its contents and also to verify that all the bytes have been successfully erased.
Save: By pressing save, all the bytes of the selected partition can be saved in a hex or bin file.