9. Build Your First IoT Application
The user can build, program, and run a simple reference application on the IoT MSK. Make sure that you have all required tools installed as described in Section 7. The IoT MSK includes reference applications provided with preconfigured KEIL projects.
9.1. How to Start Development
After downloading the IoT MSK Software , the IoT Sensors Reference Application can be found in the target_apps directory.
- Open the folder containing the IoT software files. This is the folder where you extracted the zip file
DA14585_IOTP_v6.160.x.yy.zip - To open the project in Keil, in
<IoT_MSK_root_directory>/projects/target_apps/iot/iot_585/Keil_5, double-clickiot585.uvproj. - Refer to Figure 17 To build the KEIL project.
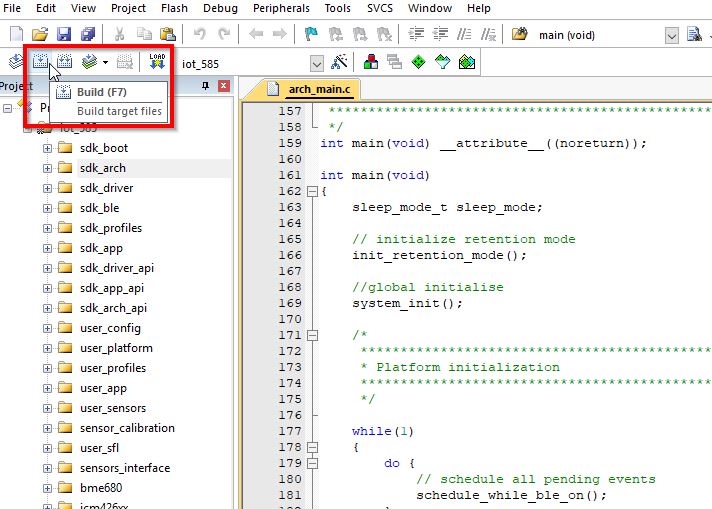
Figure 17 IoT Sensors Reference Application: Project Building
Note
- for further reading, a group of compilation switches control the application’s behavior. The most important switches are listed in Table 5: Configuration Parameters in Development Kit Developer’s Guide UM-B-101.
- The application is placed/executed in RAM. for further reading, more details about RAM management, see How to change the RAM size tutorial.
- For programming into Flash, see the next section.
Warning
- You need a KEIL μVision license because the code size of most of the IoT reference applications exceeds 32 Kbytes. (Other provided projects can be compiled using the free version of Keil). for further reading, see Section 8: Memory Footprint of Development Kit Developer’s Guide UM-B-101 .
- The DA14585 IoT Sensors Reference Application can be compiled using the ARM GCC compiler. Dialog Semiconductor provides an example Eclipse project showing how to accomplish this. for further reading, AN-B-064 describes the required steps to download and compile this project.
9.2. Flash Programming in MSK Applications using Smart Tag Application
Before continuing, ensure that you have set up the hardware as shown in Figure 6.
This section describes the mkimage tool in detail. This is a tool to create an image to burn the SPI Flash (or any other non-volatile memory) according to the memory map already specified by the dual image bootloader. The mkimage tool is only needed to create the first full image when programming a single software application from the PC using a wired UART or SWD interface. In other cases, we can use SUOTA from a mobile phone to load any application (Eddystone UID-URL, for example) in external SPI Flash memory. For further reading refer to Tutorial 6.
The programmed devices come with the a secondary bootloader already burned in the OTP memory. For further reading refer to the UM-B-012
The SmartSnippets™ tool is used to program the bootloader in OTP and to program the product header and the dual images in SPI Flash. As stated in Section 7, we recommended installing the SmartSnippets™ tools to complete the software programming. This section provides more details and shows how to burn images in SPI Flash memory.
See also
The secondary bootloader defines the memory map of the Flash consisting of two images and a program header, for further reading see Appendix A.
Note
The MSK reference application software implements the SUOTA receiver role. To support SUOTA, a dual image bootloader must be programmed in the OTP memory of the DA14585 and the corresponding non-volatile memory map must be applied in SPI Flash memory during the production phase.
These images are created by mkimage scripts or the mkimage application. Figure 18 shows the location under the IoT MSK SDK.
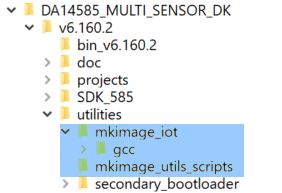
Figure 18 mkimage Scripts and Application Location
The available mkimage scripts are located (or should be placed) in .../utilities/mkimage_utils_scripts and are shown in Figure 19.
make_image_beacon.bat altbeacon_dynamic
make_image_iot.bat iot585
make_image_tag.bat smart_tag_585
make_all_images.bat

Figure 19 Available mkimage Scripts
Here after we will use the Smart Tag application as the compile example.
1- First you run the make_image_tag.bat script, you need to copy two files, in the same location as the mkimages scripts, as shown in Figure 20 :
- The generated
.hexfile by you keil project :smart_tag_585.hex - The SW Tag version
tag_sw_version.hfile found inprojects/target_apps/tag/smart_tag/src/config
make_image_tag.bat smart_tag_585
2- Then With SmartSnippets Studio, you can burn the generated .bin file (multi-image for tag application that we took as an example)

Figure 20 Flash Programming with SmartSnippets Studio
Note
- Erase: Erases the entire SPI Flash Memory
- Burn & Verify: Adds a verification step after the burn process. After burning data to SPI Flash memory, it is verified that the contents of the memory are the same with the contents of the file that has been burned.
Warning
When trying to burn the .bin at SPI Flash Memory, You are presented with the option to make it bootable. You MUST NOT select the bootable option, because special header is added before the data and the data is written starting at the selected offset. Please refer to Figure 21
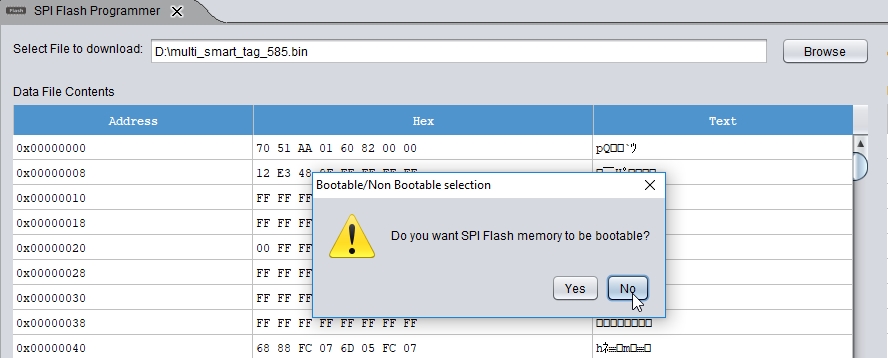
Figure 21 SPI Flash Programmer Bootable option
3- With The image is now burnt in flash and by pressing the Reset button on the CIB board, it will start working with the programmed application. Now you can see that the green Led blinks for Smart Tag Application. After 4 Minutes the Smart Tag stops advertising and enters continuous Deep Sleep mode. To restart advertising you should Press Reset on the CIB board

Figure 22 Smart Tag Application
Note
The make_image_tag.bat is executed in 4 steps as shown in Figure 23 details is given in Appendix C.

Figure 23 About Flash Programming Procedure
As shown in Figure 19, the mkimage tool has five different modes to create images.
- single: creates an
.imgfile from the.binfile of the Keil project. This image contains the software version and the software version date. - multi: creates a
.binfile from the.binfile of the Keil project. This.binfile contains two images created by the mkimage single mode and a product header at the end of the file. - whole_img: This mode is used to create a complete
.binfile. This contains two alternative.imgfiles, created by mkimage single mode, that are needed when using the SUOTA functionality, theconfig_struct.cfgfile and the product header. - multi_no_suota: This mode is used to create a whole
.imgfile containing the.binfile of the Keil project preceded by theconfig_struct.cfgfile. The image can be created for either an SPI Flash memory or an EEPROM Flash memory. The generated image will not include SUOTA functionality. - cfg: This mode is used to create a
.cfgfile containing a device configuration struct preceded by its header. The device configuration struct header also contains a 4-byte CRC which is calculated from the fields of the configuration struct. The application also checks a software version file and includes the version in the header of the corresponding field.
Note
The whole_img mode is only for beacons. It is similar to the multi mode with the addition of the beacon config struct.
9.3. Beacon Reference Applications
As shown in Figure 12, there are three different projects that demonstrate how connectable and non-connectable beacons can be used for various applications. These beacon examples use all the different beacon types and features supported by Dialog Semiconductor as shown in Table 6.
| Beacon Application | Type |
|---|---|
| altbeacon_dynamic | Non-connectable |
| eddy_uid_url_tlm | Connectable |
| ibeacon_suota_button | Non-connectable |
This section gives an overview of the UID-URL Beacon reference application design.
See also
For further reading
Section 6 of Development Kit Developer’s Guide UM-B-101 describes what beacons are, what they can be used for, and how they are implemented within the BLE software stack of the DA14585 IoT MSK.
9.3.1. Building and Running the Example
To get started with Εddystone UID-URL example you need:
- The IoT MSK
- An Android/iOS mobile application. For an Android device you can use Locate Beacon.
After downloading the IoT MSK software, the Εddystone UID-URL Beacon Reference Application can be found in the target_apps directory.
- Open the folder containing the IoT software files. This is the folder where you extracted the zip file.
- To open the project in Keil, in
<IoT_MSK_root_directory>/projects/target_apps/beacon/eddy_uid_url_tlm/Keil_5, double-clickeddy_uid_url_tlm.uvproj. - In
user_config.h, enable theUSE_EDDYSTONE_URLflag and disable theUSE_EDDYSTONE_UIDflag as shown in Code 1.
// Choose which Eddystone Mode to advertise
//#define USE_EDDYSTONE_UID
#define USE_EDDYSTONE_URL
/// Default beacon configuration struct
struct user_beacon_config_tag user_default_beacon_config = {
   .uuid = { 0x58, 0x5C, 0xDE, 0x93, 0x1B, 0x01, 0x42, 0xCC, 0x9A, 0x13, //10-byte Namespace
           0x25, 0x00, 0x9B, 0xED, 0xC6, 0x5E },   //6-byte Instance
   .major_ALT_val1 = 0x0300,  //Major Value
   .minor_ALT_val2 = 0x0200,  //Minor Value
   .company_id = DIALOG_COMP_ID,  //Beacon company ID
   .adv_int = BEACON_ADVERTISING_INTERVAL,  //Advertising interval
   .power = 0xC5,        //Tx Power
   .beacon_type = EDDYSTONE_UID,
   .url_prefix = HTTPWWW,
   .url = { 0x0E, 'd', 'i', 'a', 's', 'e', 'm', 'i', DOTCOM },
   .TLM_version = 0x00,
   .TLM_used = 0x01
};
Note
The .url field of the Beacon Configuration Struct contains the URL, preceded by its length incremented by 7 (<url_string>+7) and
followed by the URL postfix (.com). The URL prefix (HTTPWWW) is stored in the previous field of the struct .url_prefix.
- Build (you need a KEIL μVision license), download, and execute your project. For the hardware settings, see Figure 6.
The advertising string contains a encoded URL with a length ranging from 1 to 17 bytes. The Eddystone UID-URL Beacon reference application
advertises an EDDYSTONE-TLM advertising string every <defined number> EDDYSTONE-URL advertisements and then returns to
advertising Eddystone-URL strings. The Eddystone UID-TLM packet contains information about the battery voltage and the temperature
of the device, as well as how long the device has been powered on and the amount of advertising events it has executed. When connected to
a central, the device provides four different GATT services for further reading: DISS
and BASS which are official
BLE GATT services, and two Dialog proprietary GATT services, env_data_ntf and
device_config. for further reading The device_config and env_data_ntf services are described in Section 6.10 and 6.11 in
Development Kit Developer’s Guide UM-B-101.
Note
The default broadcasted link is www.diasemi.com which can be modified. The Eddystone protocol provides 17 bytes for the URL packet.
If the URL is too long you can use a URL shortener.
The Locate Beacon application searches for available beacons and lists them:
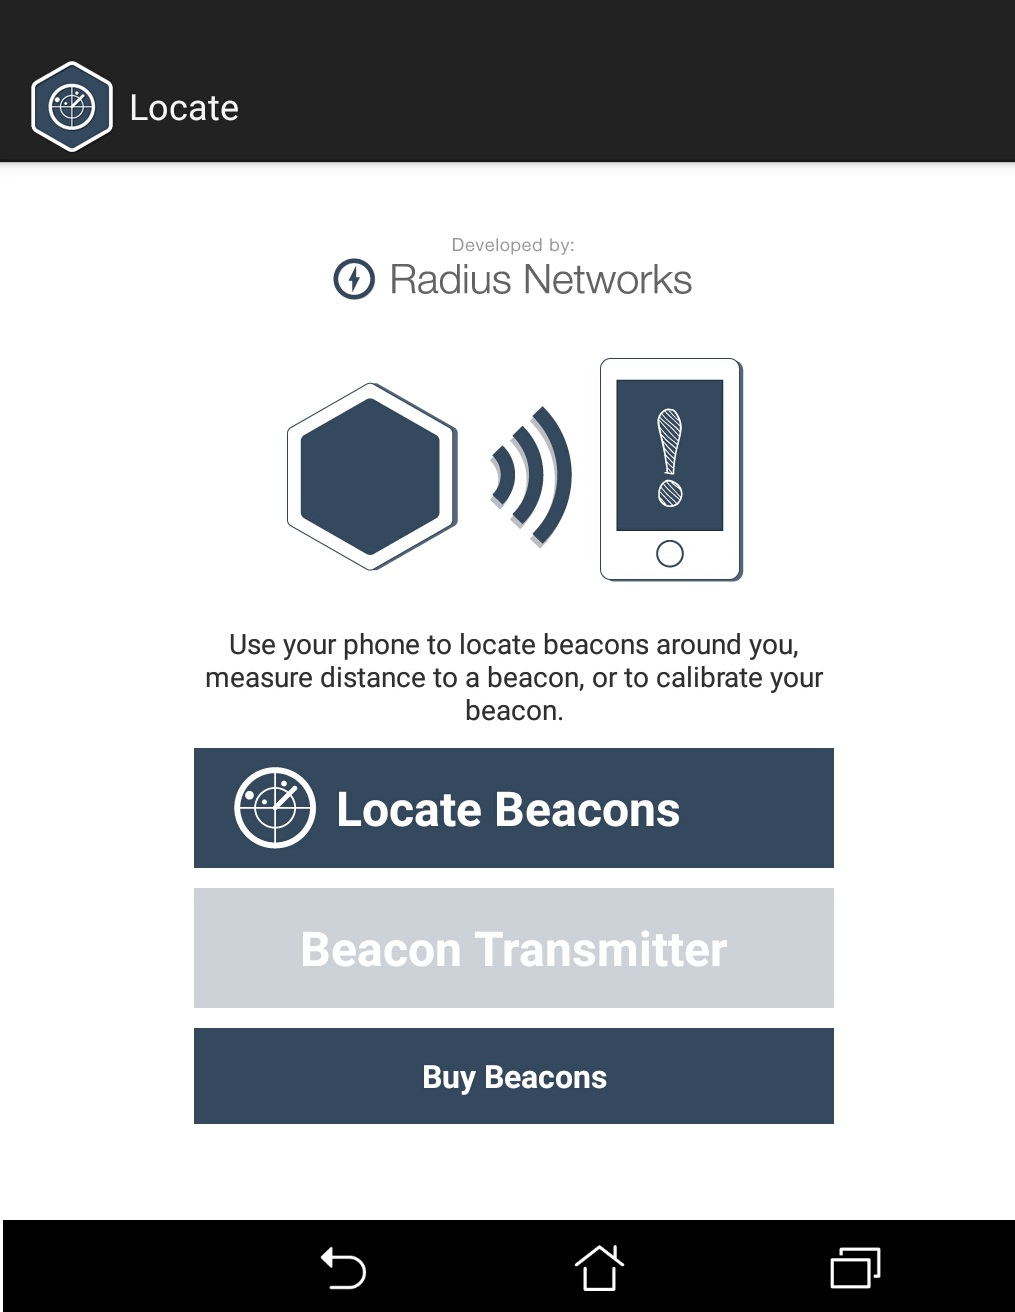
Figure 24 Locating the Beacon
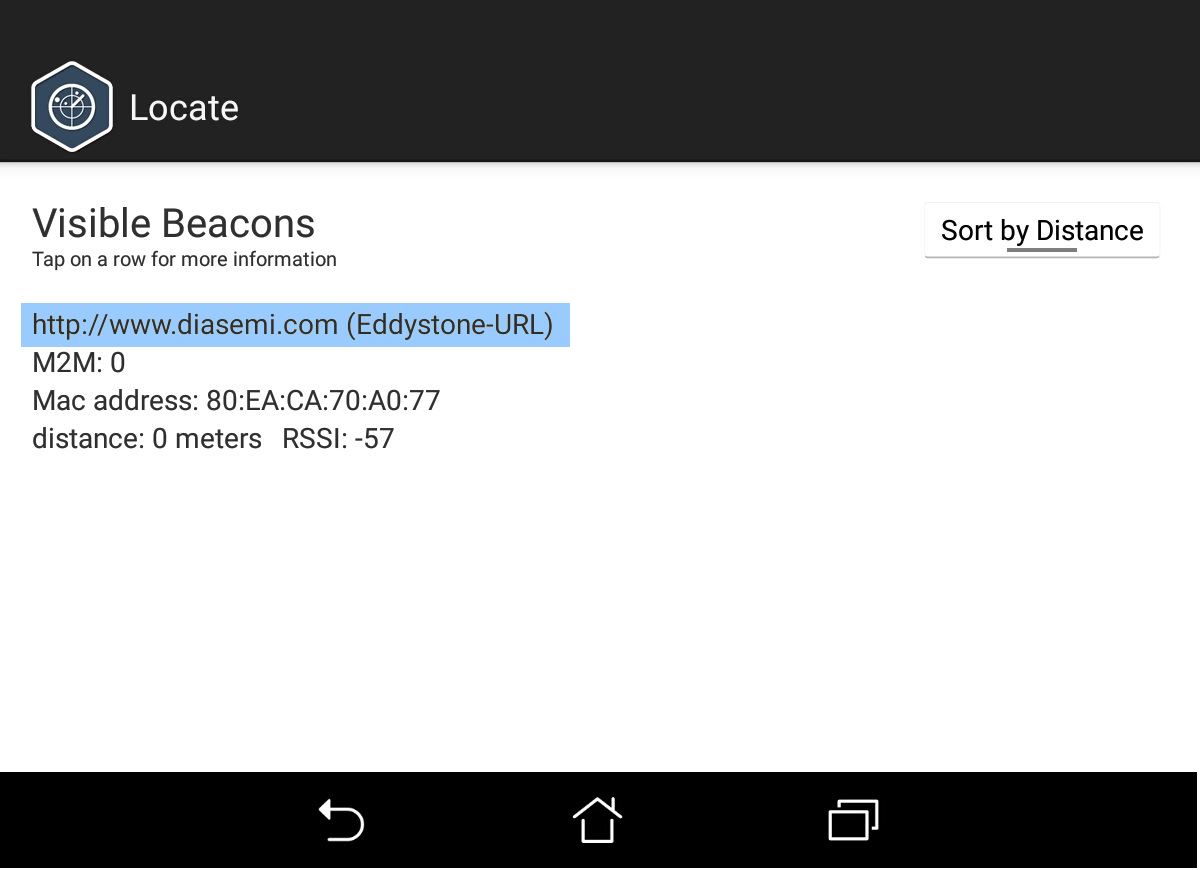
Figure 25 Connecting with the DA14585 Eddystone Beacon
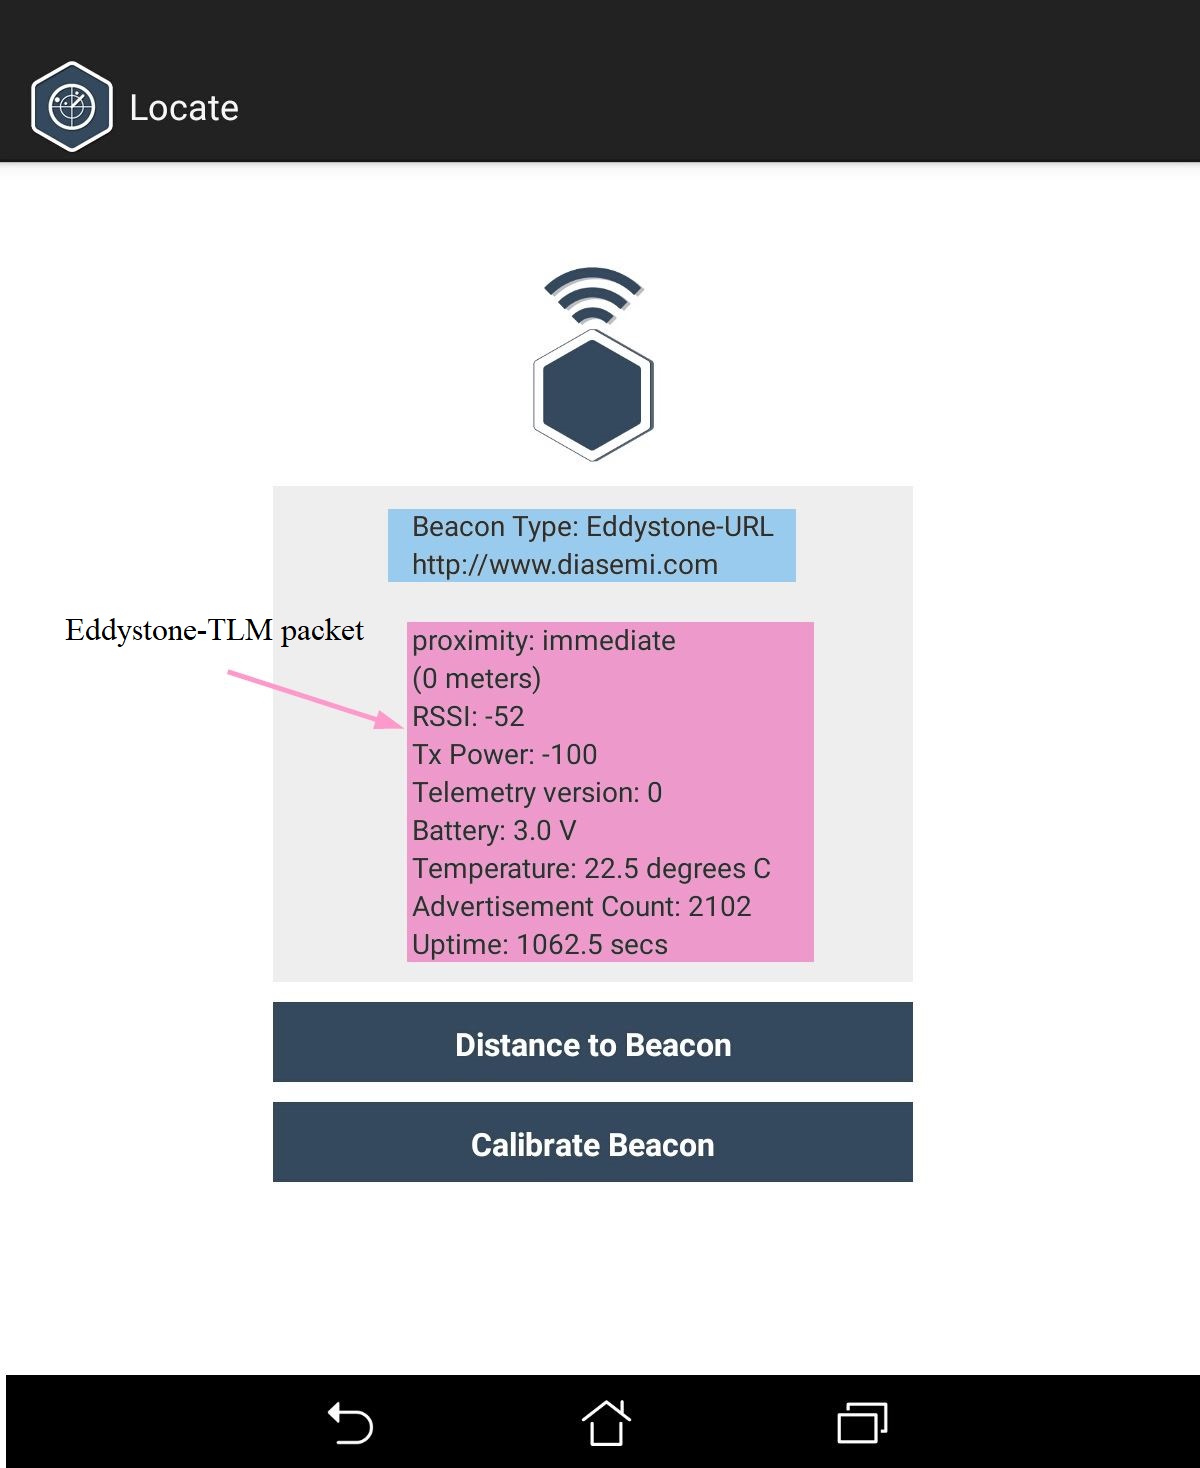
Figure 26 EDDYSTONE-TLM Data
For further reading
- About google eddystone.
- About Eddystone-url.