
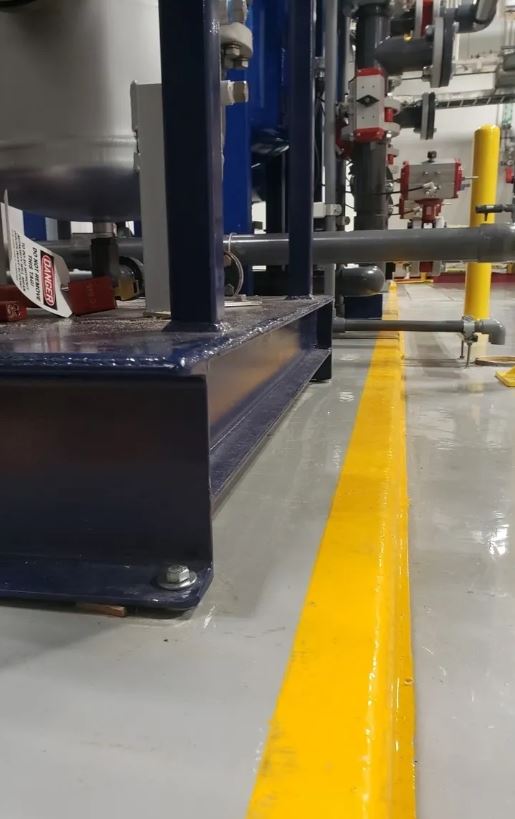
Surface prep is key for epoxy flooring. You can't just apply epoxy to any concrete and expect it to last, especially in a place like Denver. Our climate, with its freeze-thaw cycles and temperature swings, can damage a floor that isn't prepped well.
What if you skip this step or do it poorly? You'll see bubbles, peeling, and cracking. The epoxy won't bond right. That wastes money, time, and materials. The epoxy needs a clean, open surface to grip.
That’s where concrete grinding, honing, and densifying come in. Grinding gets rid of any coatings, sealers, or dirt. Honing makes the surface smooth, and densifying hardens the concrete, so it's less likely to get damaged. Then, apply a sealer for dust control and shine.
These steps make the best surface for the epoxy to stick to. This is important for busy areas in stores or warehouses. Homeowners also gain. Searching for a reliable Flooring Contractor in Denver residents depend on for durable floor coatings.. They get floors that last, are easy to care for, and look good. Even real estate investors and property managers should care, because it protects their property. So, don't cut corners on prep!
Before you put epoxy on concrete, you must know what you're working with. Concrete isn't a solid block. It's porous, like a hard sponge. This is important because epoxy needs to grab onto something, and pores provide that grip.
Denver's weather makes things tricky. Freeze-thaw cycles can harm concrete, creating cracks and weakening the surface. That means more prep work!
Next, consider the surface. Is it clean? Dust, grease, and old coatings stop epoxy from bonding. Think of taping something to a dusty window. You'll get peeling and bubbling, which no one wants.
Moisture matters too. Epoxy and water don’t mix. Too much moisture in the concrete hurts the curing, causing a weak bond. Denver's dry weather helps, but you still need to test the concrete's moisture before adding epoxy, especially in basements or near plants.
Polished concrete is different. Grinding makes the concrete smooth and reflective. The hardening part closes the pores, making the surface harder. Sealants control dust and add shine. This works for low-upkeep floors that still look good. But if you put epoxy over polished concrete, you'll need to prep it so the epoxy can grab onto the smooth surface.
Before epoxy, get the surface spotless. Remove coatings, dirt, oil, or anything that interferes with grip. A scrub with degreaser works for light messes. For tougher messes, a concrete grinder might be needed. DIYers can rent these, but they're heavy and require skill to use without damage. Professionals have the right tools and experience to do this safely.
Concrete is smooth, and epoxy needs a rough surface to grip. This "roughing up" is profiling. You can do this by acid etching, media blasting, or grinding. Acid etching is cheaper but can be inconsistent and dangerous. Grinding makes a uniform profile for better grip. For small areas, DIYers might use a handheld grinder. For larger surfaces, a walk-behind grinder works better, and is usually best left to pros.
Address any cracks or flaws in the concrete before epoxy. Fill small cracks with concrete patching compound. Larger cracks might need more work, like routing out the crack and filling it with epoxy mortar. Ignoring cracks leads to epoxy failure. The epoxy will bridge the crack and crack itself. For significant structural damage, talk to a structural engineer first.
Concrete holds moisture, which hurts epoxy. Test the concrete's moisture before applying epoxy. A calcium chloride test can show the moisture vapor emission rate. If the moisture is too high, the epoxy won't bond and can bubble or peel. You might need a moisture vapor barrier before the epoxy. Professionals have tools for accurate moisture testing.
Grinding readies the surface, and polishing makes a smooth, reflective finish. Polishing uses finer diamond abrasives to refine the concrete. Professionals do this with tools and skill. DIY concrete polishing kits exist, but a professional-looking polished concrete floor needs investment in tools and training. It's a skill that takes practice.
Before you think about epoxy, you must clean the concrete. Denver concrete, especially in commercial spaces, sees a lot. Grease, oil, and dirt get ground in. Regular sweeping will not cut it.
First: degrease. If there is oil or grease, use a concrete degreaser. Follow the product instructions. Next, pressure wash. Pressure washing will blast away loose debris and surface contaminants. Do not use too much pressure, especially on older or weaker concrete, because you do not want to damage it.
Acid etching is another option. It can be effective for opening up the concrete pores. But be careful. Use proper safety gear: gloves and eye protection. You must neutralize the acid afterward, or the remaining acid will interfere with the epoxy bond. If you are not comfortable with chemicals, let professionals handle this.
The best method depends on what you are dealing with. A showroom floor that needs a refresh differs from a warehouse floor that has been soaking up oil for years. Ignoring this step means your epoxy will not stick. You will end up with peeling and bubbling, and you will waste time and money. No one wants that.
Moisture Testing Requirements Before Polished Concrete Installation
When you prep concrete for epoxy, you must profile it. You rough it up, so the epoxy has something to grab. Skip this, and your epoxy will likely peel. Nobody wants that.
There are a few ways to profile concrete. Grinding is one. You use machines with diamond grinding pads. This is good for smoothing the surface and opening the pores. Shot blasting shoots tiny steel beads at the concrete to remove the top layer. This creates an aggressive profile. Scarifying is even more intense. It uses rotating cutters to dig into the concrete.
Now, there's Concrete Surface Profile, or CSP. It's a standard that tells you how rough the concrete surface is. CSP ranges from 1 to 9 or 10, with 1 being nearly smooth and 9 or 10 being super rough. The epoxy maker will tell you what CSP is needed for their product to stick.
Choosing the right CSP is key. A thin epoxy coating might need a CSP of 2 or 3. A thicker epoxy could need a CSP of 5 or higher. Get it wrong, and you risk adhesion problems. So, always check the epoxy's data sheet!
Concrete cracks happen. Denver's freeze-thaw cycle makes it worse. Ignoring cracks is a bad idea. Water gets in, freezes, and expands. Soon, you have a much bigger problem and a potential safety issue.
For hairline cracks, epoxy injection often works. You force epoxy into the crack, sealing it. It's strong and stops more damage. For wider cracks, or missing chunks, you need a patching compound. Many types exist, so choose carefully.
If you have a crack that moves a lot, perhaps near an expansion joint, use a flexible patching compound. If it's a static crack, a rigid one will work. Read the labels! Don't just slap it on. First, clean the crack well. Remove any loose debris. If you don't, the patch won't bond, and you'll redo it soon. Also, temperature matters. Most patching compounds need certain temperatures to cure, so check the forecast before you start.
Creating a proper surface profile is essential for mechanical bonding. Concrete profiling involves roughening the surface to provide "tooth" for the epoxy to grip onto. Methods include acid etching, grinding, or shot blasting, tailored to the concrete's condition and epoxy requirements.
Thoroughly cleaning the concrete surface is paramount for achieving optimal epoxy adhesion. Remove all traces of dust, dirt, oil, grease, and existing coatings. Employ methods like pressure washing, scrubbing with detergents, or media blasting to ensure a pristine surface.
Moisture within the concrete can severely compromise epoxy adhesion. Test the concrete's moisture content using a moisture meter. Implement mitigation strategies like applying a moisture vapor barrier or allowing sufficient drying time to ensure a dry substrate.
Moisture matters a lot when you work with epoxy and concrete. If moisture levels aren't right, your epoxy floor will fail. It will bubble, peel, and look bad. No one wants that after investing in a polished concrete floor.
How do you check for moisture? Two main ways exist: the calcium chloride test and the relative humidity probe. The calcium chloride test is older. You put down a dish with calcium chloride in it, seal it, and see how much moisture it absorbs over a few days. Then, you do some math. A good target is below 3 pounds per 1000 square feet per 24 hours.
The relative humidity probe is more advanced. You drill holes in the concrete, insert probes, and they give you a humidity reading. You want something below 75% internal relative humidity.
What if your concrete is too damp? You have to fix it. You can use moisture blocking products. These sealers stop moisture from coming up. Sometimes you need to let the concrete dry out naturally, which can take time. Ignoring high moisture is bad. Address moisture before you put down any epoxy!
You prepped your concrete, now what? Don't just slap any epoxy on there and expect it to last. The type of concrete matters, and so does what you plan to do with the floor.
For homes, aesthetics and easy cleaning are key. A decorative epoxy with good UV resistance works well. Think about spills, too. Commercial spaces need something tougher to handle foot traffic. Industrial settings? You need chemical and impact resistance to withstand heavy machinery.
Denver's temperature swings can harm epoxy. Choose wisely. Expansion and contraction can cause cracking. UV exposure is also intense, so make sure your choice is rated for that. Otherwise, it will yellow and degrade fast.
Talk to your supplier. Tell them about your concrete. Is it new, old, or porous? Tell them about the environment. Is it a garage, a restaurant kitchen, or an outdoor patio? They can help you narrow the options and avoid costly mistakes. Ignore these factors and you’ll redo the floor soon. That's a pain.
When prepping concrete for epoxy, you have two choices: DIY or hiring a pro. DIY can seem cheaper at first. But it can be more involved than you think. You might rent or buy equipment like grinders or shot blasters, based on the concrete's condition. Plus, it takes time. A small garage floor might be doable. But a whole warehouse? That will take a lot of your time.
Professionals bring the equipment and know-how. They know how to prep the concrete so the epoxy grabs on. This is important. If the epoxy doesn't stick, you will see peeling and bubbling. You might have to redo the job if you skip a step or use the wrong sandpaper.
The quality can differ a lot. Pros can spot issues with the concrete, like cracks, moisture, or old coatings. They fix them before the epoxy goes down. For bigger projects, mainly in commercial places, hiring a professional concrete service is smarter. You will save time, avoid mistakes, and get better results that last longer.
Let's examine some real-world examples in Denver where correct concrete preparation made a big difference for epoxy floors. We've seen it many times: skip the prep, and you invite problems.
Consider that showroom downtown. Before, it was a dull, dusty concrete slab that did nothing for the merchandise. We ground it down to remove the old coatings and imperfections. Then we applied a densifier to harden the surface. After that, the epoxy went on easily. The result? A glossy, durable floor makes the cars stand out.
Or think about that warehouse out by the airport. They had issues with dust, and the old floor crumbled. Grinding the surface smooth and applying a strong epoxy coating eliminated the dust problem and created a safer, more productive workspace. The difference was huge.
I wish I could show you the before-and-after photos, but believe me, they tell the story. The key is that correct concrete preparation isn't just an extra step; it's the base for a long-lasting, beautiful epoxy floor. Without it, you waste money.
Let's discuss common concrete prep problems and how to avoid expensive mistakes. Laitance is a big issue. This weak, powdery layer forms on new concrete surfaces. If you don't remove it, your epoxy won't stick. Grinding usually works best.
What about old coatings? These can cause trouble. Identify them first. Some coatings react poorly with certain epoxy systems. Grinding might be needed, or even media blasting for tougher cases.
A common mistake involves incorrect concrete profiling. Epoxy needs a rough surface to grip, like Velcro. If the concrete feels too smooth, the epoxy will fail. Grind it to the correct Concrete Surface Profile (CSP). Your epoxy maker should specify the CSP number you need.
Here is why moisture matters. Concrete is porous. If it holds moisture, the epoxy won't bond. Test the concrete for moisture content before you start. If it’s too high, dry it out, perhaps with dehumidifiers, or apply a moisture vapor barrier. Ignoring moisture sets you up for delamination, where the epoxy peels off. No one wants that.
You have an awesome epoxy floor. How do you keep it that way? Regular cleaning is key. Sweep up any loose dirt or debris often, even daily for busy spaces. Mop with a mild detergent and water. Harsh chemicals can dull or damage the epoxy.
For preventative care, use mats at entrances to trap dirt. Furniture pads are also helpful. They prevent scratches.
What about repairs? Small chips or cracks can happen. Do not ignore them! A quick epoxy repair kit from the hardware store can fix those before they become bigger problems. For larger damage, call a pro. If you're in Denver, some great local cleaning services specialize in epoxy floors. These companies can offer deep cleaning and even re-coating to extend the life of your floor.
Ignoring these things will cause your floor to get dull and scratched. It will eventually fail. Regular care is cheaper than replacing it.
When you prep concrete for epoxy, don't skip steps. The epoxy is only as good as what it sticks to. First, you must grind the surface. This removes coatings, dirt, or weak concrete. Aim for a clean, porous surface so the epoxy can grab on.
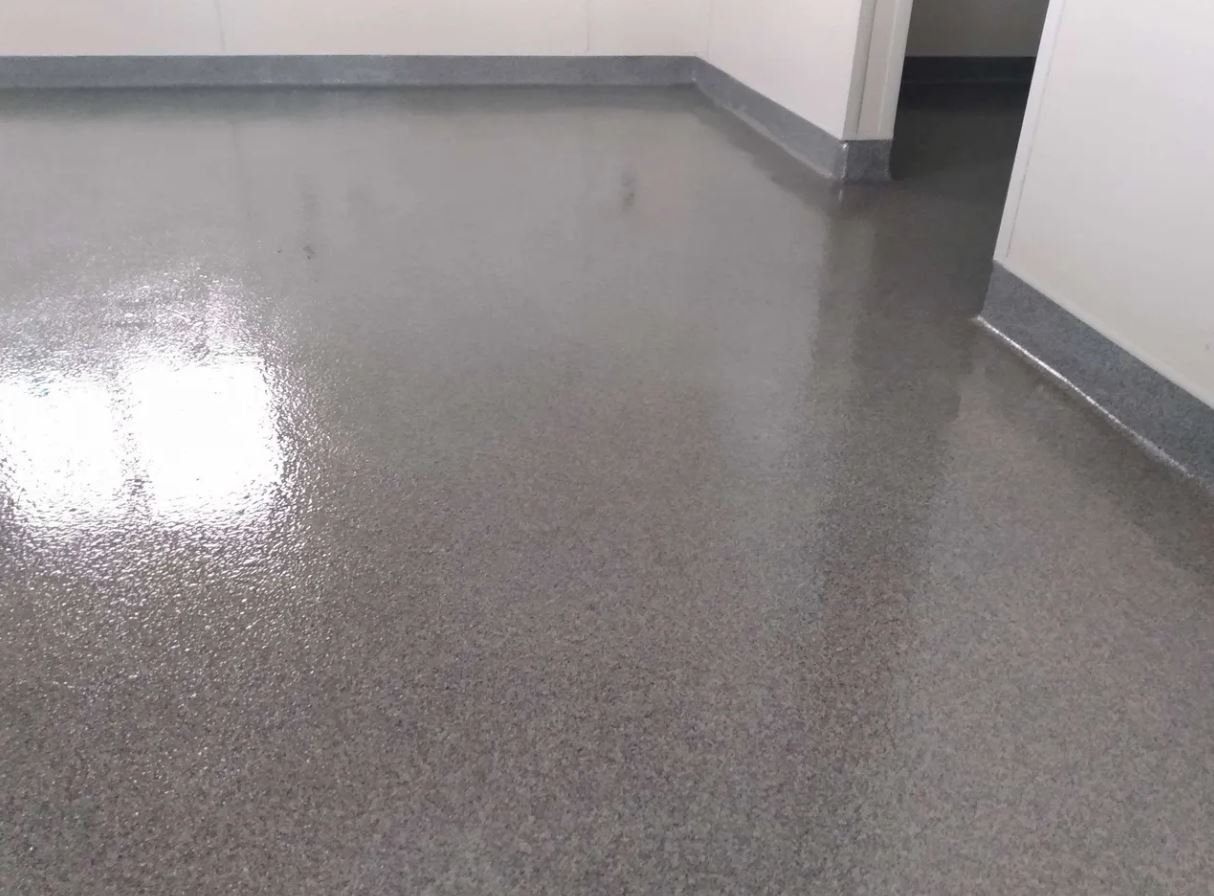
Next, honing comes into play. This is helpful if you want a smooth, reflective polished concrete look, which is popular in homes, showrooms, and warehouses. Honing refines the surface after grinding. Then, densifying strengthens the concrete. It fills in the pores and makes it less likely to dust or absorb moisture. This is important for epoxy adhesion.
Finally, don't forget the sealer. This protects the concrete and gives it a shine. A good sealer also helps with dust control, which is helpful in industrial spaces.
Use quality materials and do the job right the first time. If you cut corners, the epoxy could fail, leading to costly repairs. No one wants that.
This can be a lot of work, and it's easy to mess up if you're not experienced. If you're in the Denver area, reach out to professional flooring contractor services. They have the right equipment and know-how to get the job done correctly. This ensures your epoxy floor lasts for years. They can also advise you on the best approach for your needs, whether it's a residential garage or a commercial space.