5. Prepare the System
This section describes the steps required to prepare the Development board and other tools to successfully run the demo code.
5.1. Setup a Serial Terminal
- Prepare the connection between the device and your computer. Select a serial console and open it. In this tutorial we have selected Tera Term which is a free and easy-to-use serial terminal. Follow the steps in the following figures to successfully establish a connection via a USB port. First, configure the serial port number. If you connect the device it is automatically displayed as an option (1).
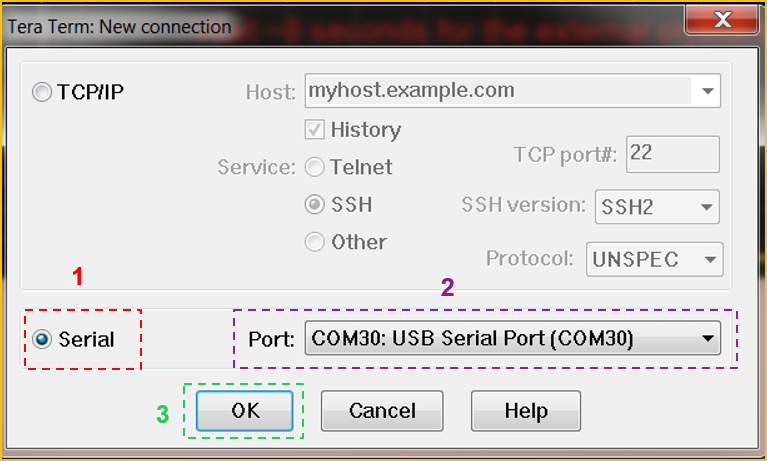
Fig. 16 Select the Serial Port to which the Development Kit is Connected
- Configure the serial configurations as defined in
startup/confic.csource file.
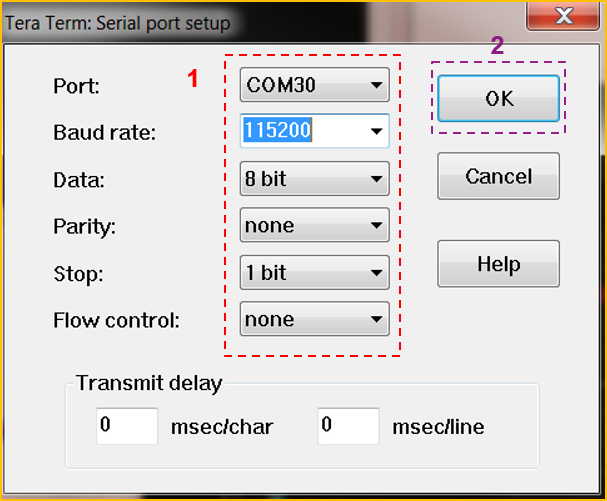
Fig. 17 Configure the Serial Port with the Correct Settings
- After successfully setting the serial port you should see the special character ‘#’ displayed on the console. It is without saying that the firmware must be already burnt in the device.
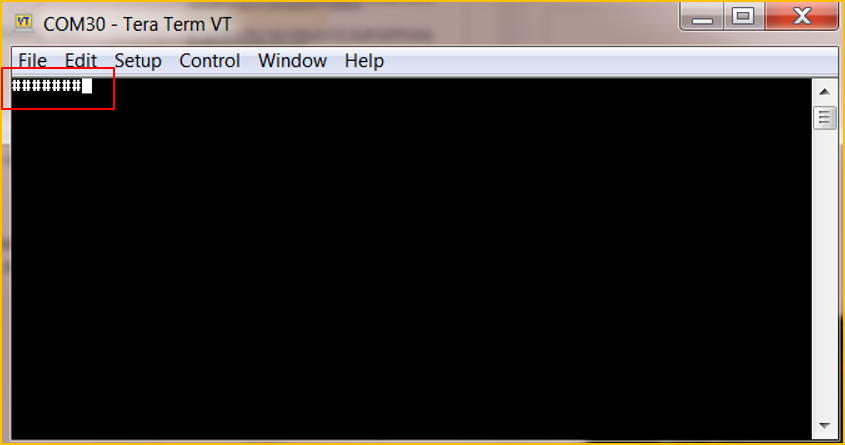
Fig. 18 The Special Character ‘#’ is Displayed on the Screen
5.2. Setup the Pro DevKit
Prepare the Development board to successfully run the code. Ensure the jumper settings are set as displayed.
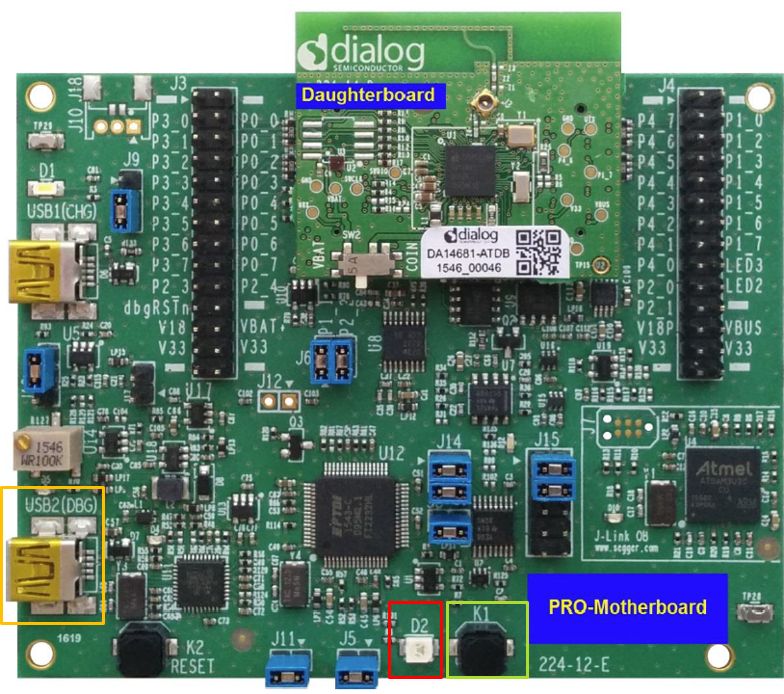
Fig. 19 The ProDev Kit (Motherboard and Daughterboard)
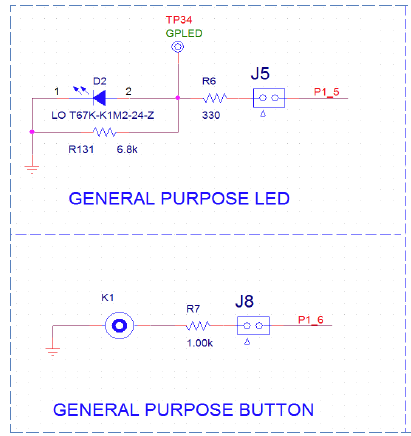
Fig. 20 General Purpose LED and BUTTON Schematics
| DA1468x Pin Name | Signal Name | Multiplexed with Functions |
|---|---|---|
| P1_5 | RTS | D2 LED, through J5 |
| P1_6 | CTS | K1 push button, through jumper J8 |
5.3. Setup the SmartSnippets Toolbox
Open the SmartSnippets Toolbox and verify the correct functionality of the device before and after it enters Sleep. It should enter Sleep mode approximately 8 seconds after a power-up event. The following video shows how to use the Power Profiler.
Presentation of the SmartSnippets Toolbox
5.3.1. Verify the correct functionality of the device
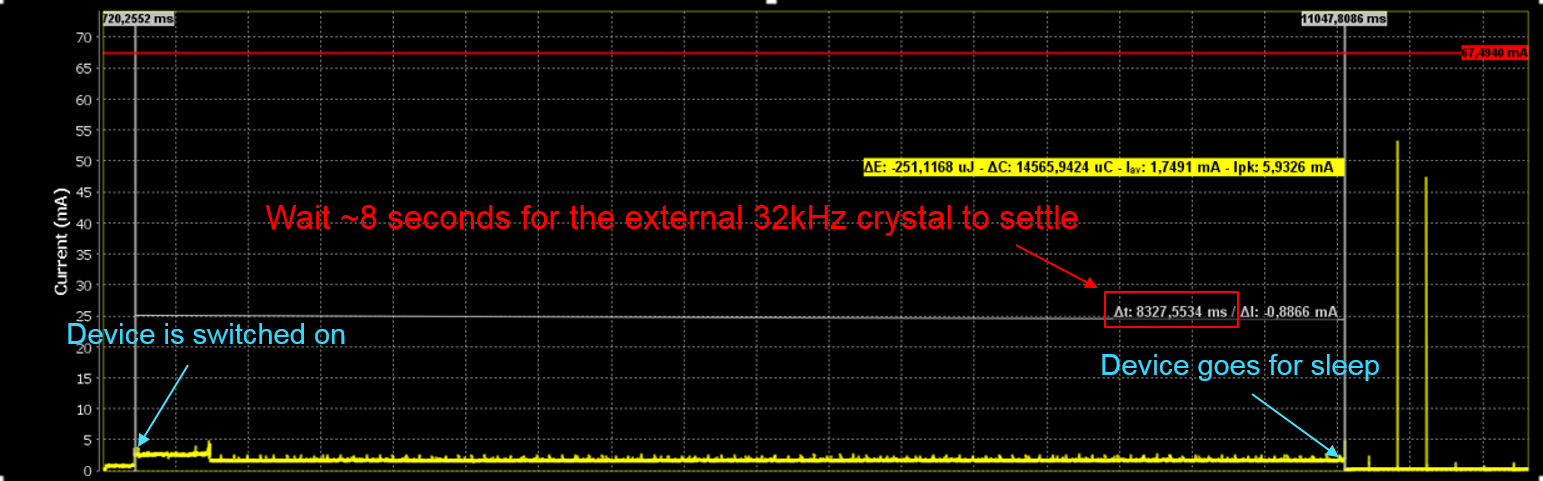
Fig. 21 Verifying the Correct Functionality of the Device before and after Entering Sleep

Fig. 22 Verifying the Correct Functionality of the Device between Wake-Ups
Note
If we don’t use the variable named pin_status_flag then the LED D2 will lose its state after
entering in sleep mode. This is the reason why this flag is used, in order the device to remember the
state of the LED before entering in sleep mode.